Tag : linkedin marketing

5 Steps To Start Social Media With A Bang!

Go-Agency-Blog-Template-7-1-200x300
24Aug

It seems there’s a certain window of time for people to establish themselves on new platforms. For example, famous “YouTubers” have been on the site for years now, and it can be tough to break into that industry since there are so many others trying to do the same thing. The same applies to Facebook, Twitter, and Instagram. Now, Snapchat is getting filled with big names quickly. What’s a newcomer to do? When you click that Sign Up button, you have a lot of catching up to do. However, it’s absolutely possible to shine online at any point. These 5 steps will give your baby social media accounts a kick start:

  1. Optimization. Starting from scratch is tedious, but it can be done. Whether you have a Facebook, Twitter, Instagram, or LinkedIn page, be sure to fill out every blank field as best you can. Just because your account is new, doesn’t mean it has to be empty.
  2. Tap into your contact list. When signing up, most social media platforms will have you utilize your email contacts so you can be reunited with your favorite people online. If you don’t use this tool, try and find your business partners, friends, family, etc. and ask them to begin liking your page and content.
  3. Promote your pages to your customers. You’ve seen them in many small businesses, those signs proudly promoting their Facebook, Twitter, or likewise. This is important and actually works! Make sure your regulars know about this new opportunity to connect, and be sure to ask them for a nice 5-star rating.
  4. Backdate new content. This tip is a Facebook exclusive. It’s intimidating for social media users to like a page that has no content. Be sure to post, post, post! But a big batch of posts from the past 24 hours won’t look so good either. Luckily, deep in its publishing tools, Facebook offers the power to “backdate” a post so it looks like you’ve been around for a while. The whole point of this is to make you look established and involved in the online community, which is one of the primary goals of social media in its essence.
  5. Advertise! If you are new to social media, you may not yet understand the power of Facebook, Twitter, Instagram, or LinkedIn advertising. You will! These advertising opportunities provide an extremely beneficial boost to your content so you will get noticed fast! There’s quite a variety to the promotional options available. From driving website to your website to sponsored content, you will be able to find one that fits your budget and works for your company.

As you can see, the words “new to social media” doesn’t need to be a death sentence. You can steadily grow your social media marketing with these tips and of course, with the help of professionals.

What do you think of these steps? Comment below!

Click Here to Subscribe to Our Free Newsletter

Read More

Your Social Media Toolbox: Software Your Social Media Needs

Your-Social-Media-Toolbox-200x300
19Jul

Social media marketers need technology to succeed. No surprise, right? While a majority of the work day is spent on Facebook, Twitter, Instagram, and the other platforms, we cannot be truly effective without a little help from third-party tools.

There are new products popping up on the internet and App Store all the time. Some are terrible, some make our lives much easier. The world of social media is face-paced and demanding, so having some tools to help is much appreciated. Here are some of the newest helpers social media professionals are integrating into their workflow:

Crowdfire- Twitter can be effective, but very competitive. Marketers need to keep a sharp eye on their followers. Crowdfire will do just that. This website will help you find new followers based on other leaders of the industry. You will also be able to weed through your followers and get rid of inactive accounts.

One Tab- Researching content is a major part of social media. Whether you are finding new content to share or you are checking your facts, you will find your browser window bursting with tabs. One Tab will combine them for easy access, allowing some space to breathe. 

PicPlayPost- Looking for a new way to bring life to your Instagram page? Check out PicPlayPost. It’s an app that allows you to add pictures and video to unique collage template. 

RiteTag- Hashtags make the world go round in social media. You got to use them! But how can you find the best tags that pertain to a specific subject? RiteTag is the answer. With a helpful browser extension, you will be able to find trending hashtags  in a snap!


There are many new social media sidekicks out there and many more on the way. The above four have proven to be very helpful for businesses. Content curation, sharing, and organization can get a whole lot of easier. You just need the right tools!

What do you think of these programs? Comment below!

Click Here to Subscribe to Our Free Newsletter

Read More

LinkedIn: 10 Steps to Creating an Impressive and Engaging Professional Profile

shutterstock_116666203
5Oct

Would you consider your professional profile maximized on LinkedIn?

If you hesitated, then the odds are that there may be some room for improvement.

When it comes to having a fully maximized profile on LinkedIn, there are many areas where your focused improvements can really make a difference.  I’ve spoken to countless people who were firm believers that their LinkedIn profiles were built to deliver results.

And then I took a look through them. Let’s just say their profiles left a lot to be desired.

By just signing up for a LinkedIn account, copying your resume points, and adding a picture – you are not putting your best foot forward. In order to create a profile built for success, you need to really illustrate your value and credibility to your target audience.

How you may ask?  Here are 10 quick changes that will help take your LinkedIn profile from a starter to a winner in no time:

1. Headshot: Ok, this seems SUPER elementary – but does your picture actually look like you?  Have you ever met someone offline that doesn’t match what they actually look like?  Doesn’t really help their credibility right?  Use a shot that looks like you!

2. Keywords: Before you start working on your LinkedIn account, pull out the list of keywords that people use to find you online.  If you don’t have one of these, make sure to take the time to put it together.  Once you do, use these keywords liberally (within reason of course) through your ENTIRE LinkedIn profile.

3. Your Professional Headline: Underneath your name you have the ability to create a wonderful and engaging headline for yourself….so why not.  For example here’s mine, “CEO of The Go! Agency, Founder of The Social Marketing Academy, Author of “The Go Method.” You can do the same. Use this real estate to your advantage.

4. Location: Make sure that the location that is mentioned in your profile is most suitable to where you do business.  So if I was based in Orlando but did 100% of my business in Tampa – I might consider using Tampa as my location.  Also, if you have moved and never updated this, it is a big no-no.  This is another way people find you on LinkedIn!

5. Add Some Posts: You can easily add some Posts from the homepage of LinkedIn.  These will show up directly underneath your Professional Profile header and will allow you to illustrate your expertise to a wide network of possible customers/clients.

6. Summary: Does your summary sound like you?  Is it in first person?  These are things that I strongly suggest.  If I wrote my summary in such a way that I said “Christopher Tompkins is the CEO of The Go! Agency” versus “I am the CEO of The Go! Agency”….you can see the difference.  You want people to engage with you – so don’t sound like a company bio from a corporate website, add a personal touch.

7. Add Files to Summary: Make your profile come alive by adding pdfs, links, and much more to your website.  This way you can showcase your work in a whole new fashion.  Well worth the time and will really look impressive to those who use your profile.

8. Bring Your Experience to Life Visually: There is nothing better than seeing visuals attached to the company that you have worked in. And LinkedIn wants to empower you to do this!  So you can add Documents, Photos, Links, Videos, and Presentations to your experience to really shine!

9. Testimonials: If you are not getting testimonials to add to your experience you are missing out on POWERFUL third-party endorsements that will really make you look like the expert you are.  Don’t hesitate to ask and follow up on these.

10. Fill in Everything: I know, I know – there are a lot of sections that may not pertain to you.  But fill in every section until it is either maxed out, or it ABSOLUTELY does not apply to you.  Think outside of the box – you might just be able to fill out more sections than you had originally thought!

My best tip I have left until last … DON’T NEGLECT.  And by this I mean, don’t complete your profile once and then never go back again.  There are so many variables in life and these always need to be reflected in your profile.  Win an award?  Add it to your profile. New brochure? Add it to your profile. New company video? Add it to your profile. Promotion? Add it to your profile.

Start off with these tips and you will be on your way to creating a winning LinkedIn profile that gets more views!

Read More

Increase Social Media Engagement: 10 Ways to Optimize Your Social Media Content

keep-calm-and-optimize-28
22Jun

Attempting to master social media marketing can be both confusing and overwhelming at times.  Keeping track of all of the latest changes and trends, while trying to implement all of the newest tips and tricks can be challenging for a busy company.

When it comes to social media, the nucleus of all engagement is content.  So no matter what different changes may happen to the structure of social media sites, the one thing that will remain the same is the importance of well executed, optimized, engaging content.

Say you already have excellent content in place, but your posts are not generating the results that your campaign needs to deliver.  What’s the problem?

While writing great content is a constant, optimizing it is a constantly evolving medium.  Optimizing your content for social media sites such as Facebook, LinkedIn, and Twitter can be as specific as changing an element within your post to work with the infrastructure of each one of these juggernauts.

We all know that writing custom content for your social media marketing campaign can be time consuming, so let’s make sure that all of that time spent is an investment that will go towards accomplishing our goals.

What I want to share with you here are ten of my own personal tips for helping your social media marketing content truly “pop” online so that you will get increased engagement through shares, likes, comments and much more!

The list below is not in order of importance: these are all vital factors that will help enhance your social media campaign’s success over time:

1.  Keywords: When developing strong social media content, keywords are absolutely essential.  The words or phrases that your target audience use to find your company (both online and offline) should always be handy when you are developing your content.  My tip is to create a list of keywords that you can add to your updates, and then use them when suitable.  These keywords will turn into hashtags and will help increase your visibility and engagement (more on this later).

2.  Be Conversational: What does your content look like?  When you read it out loud does it sound like a used car advertisement?  Does the post draw you closer, or push you away?  Imagine your post intermingled with all of the other posts (of direct and indirect competitors) vying for your target audience’s attention.  Does it still stand out? One of my top tips with social media posts is to remember that they need to be “social” i.e. conversational.  You want to start a conversational exchange with your audience – which is what engagement is!  So read your content out loud after you write it and make sure that it reads as if you are saying it – not writing it. Having your content sound “human” and not like “sales and marketing copy” is absolutely essential.

3.  Use Different Content Lengths:  Not every social media site is looking for a 140 character solution.  So writing one update and sending it through to all social media networks is not the best rule.  The ideal way of optimizing your content for size is to begin by writing a short update for Twitter (maximum 120 characters to promote sharing). Then write a slightly longer one that you can post on Facebook and LinkedIn.  This way you are able to move beyond Twitter’s character constraints when writing content, giving you freedom to enhance your posts with more engaging content, as well as giving you the ability to add further optimization through additional hashtags, tags, links, and more.

4.  Call to Action: One of the first things I learned when I launched our online marketing agency 7 years ago was the power of asking for what you wanted.  People move through social media content so fast that they don’t have time to read your mind and or read between the lines.  If you want someone to perform a certain action, make sure to tell them what you would like them to do: read this story, click this link, sign up today, etc.

5.  Shorten Your Links: On some social media sites, namely Twitter, size is everything…when it comes to characters of course.  So when you are sharing a link within your allowed 140 characters, and the link takes up nearly 60% of your available characters allocation – how are you supposed to engage your audience?  Use a link shortening tool to save space to allow your content to breath.  Also, if you are sharing links on other social media sites, a short and concise link will prevent the link breaking when posting to your social media profile.  It’s a little extra insurance that will come in handy.

6.  Hashtags: A hashtag is a type of label used on specific social media sites which makes it easier for users to find social media updates (or messages) with a specific theme or specific content. In basic terms, a hashtag indexes a post to be about a certain topic, rather than just mentioning it in the conversation so that it can easily be found and referenced.  By hash tagging your KEYWORDS within your social media content, you will enhance your “find-ability” on the social web exponentially, thus optimizing it.

7.  Tagging: Tagging on social media is a way of connecting YOUR social media content with another person, company, topic, or event.  So whereas hashtags connect general KEYWORDS together (such as #socialmedia, #onlinemarketing, #contentstrategy), tags connect social media content to specific social media accounts. This is a great way to increase your visibility with not only potential customers, but also referral sources and influencers. These are essential in helping your content gain more visibility and engagement through association.

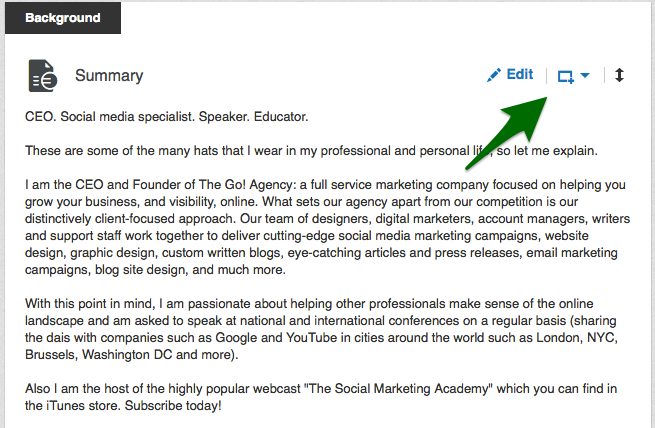
8.  Photos/Images: While many people are getting wrapped up in the semantics of writing the “perfect social media post”, they are forgetting one of the most straightforward engagement enhancer: visuals.  While you can have a perfectly optimized post, it is not truly optimized unless you add a visual.  By adding a complimentary picture, a custom designed graphic, infographic, or even a candid shot that you took with your phone, you engage your audience in a more instantaneous way.  For example, think about when you scroll through the newsfeed, are your reading the content or looking at the pictures? You’ll find yourself engaged with visuals more quickly than the actual written words.

9.  Videos: Videos have long been heralded as the “be all and end all” of online marketing optimization.  So why aren’t more people doing them?  Time, money and lack of know-how.  Well, you are not alone if this sounds like you!  Videos done professionally or casually with your mobile device, can bring your content to life and create engagement.  You don’t have to be Steven Spielberg to create an engaging social media video.  As is true in the previous point (visuals are crucial to enhancing engagement), videos really promote enhanced engagement.  For example again, think about how many times you stop at those auto-play videos on Facebook.  You probably remember the video as opposed to the content.  Or the video led you to actually reading the social media posting associated with it, which you would have normally overlooked.

10.  Don’t Always Rely on Third-Party Scheduling Tools: Especially when it comes to Facebook and LinkedIn.  While third-party tools won’t affect your Twitter posts, they really do reduce your optimization opportunities on sites like Facebook and LinkedIn: your hashtags won’t work, your tagging won’t show up, and your previews are tough to edit.  Not to mention the fact that many sites don’t add posts scheduled through third-party tools to the insights that help you understand what posts are successful and which ones aren’t.  By adding your content directly to Facebook and LinkedIn you will escape this risk.  This way you will have full control over how effective your content is.  It will take extra time, but will increase your overall effectiveness!

These are my top 10 ways of optimizing your social media content to promote increased engagement.  While they may take a little extra time, it is a worthwhile investment.  Engaging your audience with your content is one thing, but actually having the tools to make your content more findable is absolutely essential to success.

I’m sure there are also ways that have worked for you.  If you have any others that you think should be added to the list, what would they be?  Please share your thoughts in the comments section below.

Need Online Marketing Help?

Fill Out the Form Below and We Will Get Right Back to You!

[ninja_forms_display_form id=1]

Read More

The Best Times to Post on Facebook, LinkedIn, Twitter

socialclock
6Mar

When you are executing a social media marketing strategy, there is a lot to think about.  You might be concerned about:

  • The use of visuals
  • Your content strategy
  • Who will be executing the work
  • How will you measure your results
  • When the work will be done

There is such an overwhelming amount of planning that goes into executing a social media marketing strategy that it is inevitable that something will be left to the last minute.  In my experience an extremely vital point that gets left out in the cold during the social media strategy planning stage is when is the best time to post content to Facebook, LinkedIn and Twitter?!

While this is a seemingly unimportant factor, I am here to tell you that it is absolutely vital to your social media strategy.  Just think, for example, of an email marketing campaign that you have previously executed.  If you have looked at the studies done on email marketing, I am sure that you found out that by altering the time and date of your blasts, you can increase effectiveness.

And I am here to tell you that this is definitely true.  We have executed email marketing campaigns for our clients and when we discovered the optimum time and date for them to be sent, their success rate skyrocketed!

This holds true also when we find the optimum posting time for our clients on social media.  Before, they had a well written post with wonderful content that was languishing at the bottom of the barrel.  Once we found the optimal posting time and used it, we could take this same exact post and garner exponentially more engagement…with only changing the time and date it was shared!

Have you ever posted something to social media that you truly believed to be earth-shatteringly good and….crickets?  This is a prime example of the importance of choosing the right time and date when posting your social media content.  I know how much time it takes to formulate good, engaging content, and I for one want it to be successful every time I post it!

To help you along, here are some times that we have found to be helpful when posting content to Facebook, LinkedIn and Twitter respectively.

Facebook:

  • Best Time to Post: Daily, between 1-4pm
  • Peak Time to Post: Wednesdays at 3pm
  • Worst Time to Post: Saturday and Sunday before 8am and after 8pm

Twitter:

  • Best Time to Post: Monday through Thursday, 1-3pm
  • Peak Time to Post: Monday through Thursday, 9am-3pm
  • Worst Time to Post: Everyday after 8pm, Fridays after 3pm

LinkedIn:

  • Best Time to Post: Tuesday through Thursday
  • Peak Time to Post: Noon, 5-6pm, Tuesday through Thursday
  • Worst Time to Post: Monday through Friday, 10pm-6am

These are simply guidelines for you to use which will effectively bring you closer to finding the optimal time for you to post on Facebook, LinkedIn and Twitter.  I know some industries that we work with where these hours don’t always hold up as the best.

The moral of the story is to try these out, and monitor your success.  You will need to massage these times and dates to find out what works best for you.  When it comes to your content, what should be the most important thing is that you plan to deliver it to the correct audience at the time when they are ready to receive it.  This will create a social media home run not only for your content, but also your campaign!

Need Online Marketing Help?

Fill Out the Form Below and We Will Get Right Back to You!

[ninja_forms_display_form id=1]

Read More

4 Visual Elements You Forgot to Add to Your LinkedIn Profile

Edit_Profile___LinkedIn
6Nov

I was recently holding a training class at our office and while I was going through the process of explaining how to setup your LinkedIn profile for networking success, there was a key aspect which surprised the class: that you can add files, links and videos to your profile!

As these business owners were surprised by this, I thought it would be useful to share this little trick which will help you enhance your profile to make it much more engaging to your target audience.

While logged into your LinkedIn account, go to your profile page and click the “Edit” button.  You will see a square with an arrow near the top right corner of both the Summary and Experience sections.  When you click this icon you will see that you have the opportunity to  “add a link” or “upload a file”.  By adding a link, you are linking to information available online.  It will provide a preview and you can edit the description. If you click “upload a file” you choose the file that you want to upload from your computer and edit the title and description.

So, just choose what you like, click save, and the information appears on your profile.  You can grab and drag these blocks to be arranged however you want, so it is very easy for you to edit the look and feel of your profile.

So very easy to do….but what content are we talking about here?

Social media is most effective when visuals are used. So when you are looking for what to add to your LinkedIn profile, this is the perfect place to start.

Video. The most powerful when done correctly, your videos are prime opportunities to show your skill and gain credibility.  Choose videos that you have posted online (on your website, YouTube or other site) and copy and paste the link to your video.  This can be a commercial, review, media appearance, or even some raw footage of “behind the scenes” at your company.  All of these are great opportunities to bring your brand to life on your profile.

Images. When it comes to adding images, make sure that the images aren’t “stock images”.  Look at what visual items you have at your disposal.  Your brochure.  Your one-sheet sales promotion, coupons, proposals, testimonial sheets, or even advertisements.  By posting these on your profile in the right spots you will be able to leverage the power of these visuals to tell more of your company’s story as well as elevate your credibility in the LinkedIn climate, as well as your niche.

Documents.  Do you require potential clients or current clients to fill out any forms?  Add them to your LinkedIn profile and share the link with them to download.  This will send more traffic to your LinkedIn profile as well as have these people learn more about you than they knew before.  By doing this, you at times can convert a warm lead into a hot sale.

Presentation. Have you painstakingly created a compelling presentation, either by video or Power Point?  Share it on your profile!  There is no better way to show off your deck than to add it to your already exciting profile.  The best way to do this is to share a link to where it is located so that the viewer can easily click and view it.  Don’t have one?  Create one for just the purpose of showcasing your brand on LinkedIn.  It is as easy as creating a professional looking Power Point.

These four visual points are my top suggestions when it comes to adding some intrigue to your profile.  One point to remember is to post the items in the right spots on your profile.  You can add them to your Summary and then to your professional Experience.  As everyone has a different way of presenting themselves on LinkedIn, ensure that your choice of visuals coincide with your messaging flawlessly.

Otherwise you will come off as inauthentic…which is not good. Adding strong visuals to your LinkedIn profile will enable you to take your visibility and credibility to the next level.

Need Online Marketing Help?

Fill Out the Form Below and We Will Get Right Back to You!

[ninja_forms_display_form id=1]

Read More

LinkedIn Showcase Pages: A Major Change to Your LinkedIn Company Page

Screenshot-of-Office-Showcase-Page-of-Microsoft-Company-Page-11-18-2013-10-11-01-PM1-640x327
14Apr

If you have been keeping up with the content I share here on our blog, as well as on my radio show “The Social Marketing Academy”, you will know that I am a huge proponent of the power of using LinkedIn to promote and brand your business online.  The sheer number of possibilities available to your business on LinkedIn is seemingly endless.

Aside from your professional LinkedIn profile (which is where you go when you log into your LinkedIn account) you also have the opportunity of creating a LinkedIn Company Page.  I’m sure that many of you reading this already have LinkedIn Company Pages and have packed them with the information your target market would find engaging.

But did you know that LinkedIn has recently made a major change to that Company Page?

If you are reading this now, your LinkedIn company page no longer has a “Products” or “Services” page – as well as a featured products and services splash page.  This page appeared on the top tab next to your logo and when you clicked on it, you were able to see the list of products and services as well as an optional splash page to further engage your audience.

While this leaves a huge void in your Company Page – trust LinkedIn to already have the solution ready for you to use.  In order to help companies focus more on sharing information regarding specific services that are offered by their companies, LinkedIn has created “Showcase Pages” which allow you to create a custom page for each individual product or service that your business offers.

These pages can be very useful in increasing visibility to key service/product offerings that you want to focus on, so let’s get you started in creating your first Showcase Page today!

Here is a quick step-by-step guide to getting your LinkedIn Showcase Page up and running in just a matter of minutes:

  1. From all of your products/services, choose your most popular one to focus your first Showcase Page around.
  2. Go to your LinkedIn Company Page and then click the “Edit” tab on the right-hand side.  On the drop-down menu, choose “Create a Showcase Page”.
  3. On the box that pops up, add your Showcase Page Name – which would be the name of the product or service that you have chose to feature. Then choose the page administrators (you will be shown as a default administrator) and click “Create Page”.
  4. This will now take you to the main “Overview” section of your Showcase Page.  This is where you have to get your branding right. It all starts off with your Full Width Image.  This will be similar to your Facebook Cover Image and should be inline with the branding you use on your website or online point of sale. Make sure that this is 974 x 330 pixels or larger with a maximum file size of 2MB. It can be in PNG, JPEG or GIF formats. Click “Add Image” and then choose it from your files, upload and click “Save”.
  5. Now you will see a gray box where there are 3 items you need to complete.  First, choose the language you want to optimize your Showcase Page Name and Description for.
  6. Next make sure that your Showcase Page Name is correct, and then move onto the Showcase Page Description section.  Here you need to briefly describe your product or service and let your target audience know what to expect from this page.  The catch?  You only have 200 characters to do it with – so you have to get right to the point! Note: I think this is the most challenging step of creating the Showcase Page.
  7. Designated Admins: here you can add or change the administrators that you chose when you first created the Showcase Page.
  8. Logos.  Now you have to choose your logos for the page (which is very similar to when you create your Company Page in the first place).  If your product or service has its own unique logo, then add it here.  If not, use your company logo in these spaces.  Make sure that your standard logo is 100 x 60 pixels and your square logo is 50 x 50 pixels.  These will be used in your Showcase Page’s network updates, so make sure it is on-point!
  9. Featured Groups.  Do you have a custom LinkedIn group directly associated with the topic of your Showcase Page?  If so, add it to the Featured Groups section by typing in the name and choosing it from the list provided.
  10. Next scroll up to the top, and on the right-hand column you will see a spot that asks you for your Showcase Page Website URL.  Copy and paste in the URL from the page in your website that is directly associated with the product or service you are featuring on your Showcase Page.
  11. Now choose your Main Showcase Page Industry from the drop down list.
  12. If you want to associate your Showcase Page with your company, click “Enable”.  If not, leave the box unchecked.
  13. Click Publish!

Now you have created your first Showcase Page!

But what now?

Now you will be able to share updates to this Showcase Page that are SPECIFIC to the product or service.  Say for example, that your company is an assisted living facility and you have created a Showcase Page around your “Memory Care” service.  So, when you go to post updates to your page, these posts will be related to your memory care service, memory care topics and other related items that would interest those members of your target market who you want to engage with your page.

Essentially Showcase Pages are Company Pages on steroids as you can provide a full page of useful information related to a specific product or service.  Make sure that you are able to post on a consistent basis and make sure that you promote them to your extended networks online and off.

Need Online Marketing Help?

Fill Out the Form Below and We Will Get Right Back to You!

[ninja_forms_display_form id=1]


Read More

How to Enhance and Maximize Your LinkedIn Company Page

20Aug

In my previous post I showed you how to create a Company Page for your business on LinkedIn as well as how to add your products and services to the page to increase visibility and credibility.

Now there is another step that will take your LinkedIn Company Page to the next level, but it is one that is little known.  There is a feature on LinkedIn that will enable you to customize how your page appears to people in different regions, but more importantly you can enhance your page visually.  Here’s how!

1.  Login to LinkedIn and then navigate to your LinkedIn Company Page.

2.  Click on “Services” when you get to your page.

3.  Once on the “Services” page, click on “Edit”.

4.  Now you will see that the view on the page has changed drastically. There will be a 4 step process to complete to customize your page fully.  First up is to setup your default settings, to do this you can skip “Step 1. Create multiple variations of this page.”

5.  Now onto Step 2.  Here create an eye-catching header and description that completely describes what you do and is packed with keywords to enhance your LinkedIn visibility.

6.  Now onto Step 3, which I think is absolutely crucial to make your page visually stunning.  You are able to create three different banners of 646 x 222 pixels (max 2MB in size).  I would suggest that you use the following topics to create a banner around: sales, key products, new services, exclusive information,etc.  It would be useful to have a graphic designer create these for you, preferably the one who has created the rest of your branded collateral.  Once you have these, first copy and paste the URL that you would like the image to click through to into the space provided.  Then click on “Add a banner image here”, browse for the image, choose and save.  Then repeat this for the second and third banners.

7.  Step 4 is extremely useful, as when you add multiple services and products to your LinkedIn Company Page, the order they are presented may not be how you want them to appear.  Here you are able to choose the order of how your services will be presented.  Simply click on the drop-down menus and choose each accordingly.

8.  The last area to be completed on the left hand side is the Disclaimer, if you have one, add it here.

9.  Now onto the right hand side, which is quick and easy.  If you have a video that is available on YouTube which presents an overview of your company, products and/or services this is where you can feature it on your page.  First add an eye catching, keyword loaded title and then copy and paste the YouTube video URL.  Once you are done, scroll to the top of the page and click the “Publish” button on the right hand side.

Now you can take a look at your new page and test it for effectiveness.  Make sure that the images appear as desired and that the click-through links are accurate.  Check to see if the video is working adequately.  Double check the spelling and keyword placement.

And there you are!  You have created your first enhanced LinkedIn Company Page!  Now get out there and let people know about it by sharing links to your page on your personal profile as well as your other social media profiles.

Need Online Marketing Help?

Fill Out the Form Below and We Will Get Right Back to You!

[ninja_forms_display_form id=1]

Read More

How to Feature Your Products and Services on Your LinkedIn Company Page

16Aug

In my last post I took you through the step by step process of setting up your first LinkedIn Company Page for your business.  If you missed this post, check it out in our blog archives.

Now that you have your LinkedIn Company Page set up, its time to feature your products and services.  By doing this, you are able to showcase your offerings in a way that is not only visual, but also wonderful for searches on LinkedIn.

Once again the process is fairly straight-forward and doesn’t take very long.  By following these instructions to the letter, you will get started in no-time!

  1.  Login to your LinkedIn account.
  2. In the search bar, key in the name of your company, then choose it from the drop down list.
  3. This will take you to your LinkedIn Page.  Now that you are here you will notice that underneath your company name there are different page tabs: Home, Products, Insights, Analytics. We are going to focus on the “Products” tab here, so click on this.
  4. Now you will see the page with a box that says “Showcase what your business has to offer”.  Take a quick read through this and then click “Get Started”.
  5. Now you are on the typical page where you will add your products and services from now on in.  First you want to identify if you are going to add a product or service – tick the box next to the one you choose.
  6. Then select a category for the product or service – think about in the grand scheme of things, where it will fit in best.
  7. Next, add your product or service’s name.  Be specific and if you have model numbers or other specific details, here is the place to add it!
  8. Now it is time for a photo.  If you are adding a product, make sure to use an excellent picture of that exact product.  If you are featuring a service, use a picture that is representative of that service.  Make sure that it is 100 x 80 pixels and no larger than 2 MB in size.
  9. Now you need to add a brief description of your product or service.  I would copy and paste this from your website and then edit for keywords and length.
  10.  Next add a list of key features.  This is a great way to show the benefits of your product or service as well as get in those all important keywords. Have more features than the four boxes provided?  Simply click “Add more features” and additional boxes will appear for you to fill out.
  11.  Need to add a disclaimer?  Next is your chance to add one by simply typing it into the space provided.  And with that….you are done with the left hand column.
  12.  Now, onto the right column! First on the right hand side, add the URL for your product and service (which means where people can click and learn more or purchase your product or service).
  13.  Next you want to add people to the “Contact us” section who can help anyone who is interested in learning more about what is on offer.  In the blank space, where it says “Employee name…” key in the contact from your company and choose from the dropdown list.  You can add three people here if you like.
  14.  Now you can add a promotion!  Is there a special offer or a coupon that a visitor can get on the web?  Give your promotion a title, share the URL and then describe the promotion….easy as that.
  15.  Finally, do you have a feature for this product or service on YouTube?  This is your chance to add it.  Simply copy and paste the YouTube video address and paste it in the space provided.  Give LinkedIn a few seconds and you will see your video pop up!
  16.  The last step is to scroll to the top of the page and click the “Publish” button on the right hand side.

Congrats!  You have now added your first product or service to your LinkedIn Company Page!  If you want to add more products and services, all you need to do is click on the “Tools” button on your company homepage and choose “Add product or service” from the dropdown menu.  In our next post, I will show you how to enhance your LinkedIn Company Page to truly make it stand out from the competition. Have any questions or need help with your social media marketing?  Make sure to reach out to us at The Go! Agency – we are experts at helping you achieve your goals online.

Need Online Marketing Help?

Fill Out the Form Below and We Will Get Right Back to You!

[ninja_forms_display_form id=1]

Read More
x
Bulletproof Marketer