Last week, I showed how to create overlays for your Facebook Live streams by creating transparent images in graphics software, then adding them to your video via Open Broadcaster Software (OBS) – free live streaming software.
This week, I’m going to show how to stream live to Facebook via OBS. So those cool overlays you’ve made show up in your videos.
How To Stream To Facebook From OBS
Using Open Broadcaster Software (OBS) to stream to Facebook Live might be a little different to how you’re used to doing your live videos.
Usually, when you want to do a Facebook Live, you simply go to your Facebook page and click “Start a Live Video” under your status update bar.
This starts up a direct feed from your webcam. No use when you want to add overlays to your video.

To get overlays on our Facebook live and do real-time editing, we must first send our webcam signal to OBS, which edits our video stream, then send that stream on to Facebook Live:
 To set up your OBS, first, take a look at last week’s post where I show how to setup your overlays with OBS. This will connect your webcam to OBS like so:
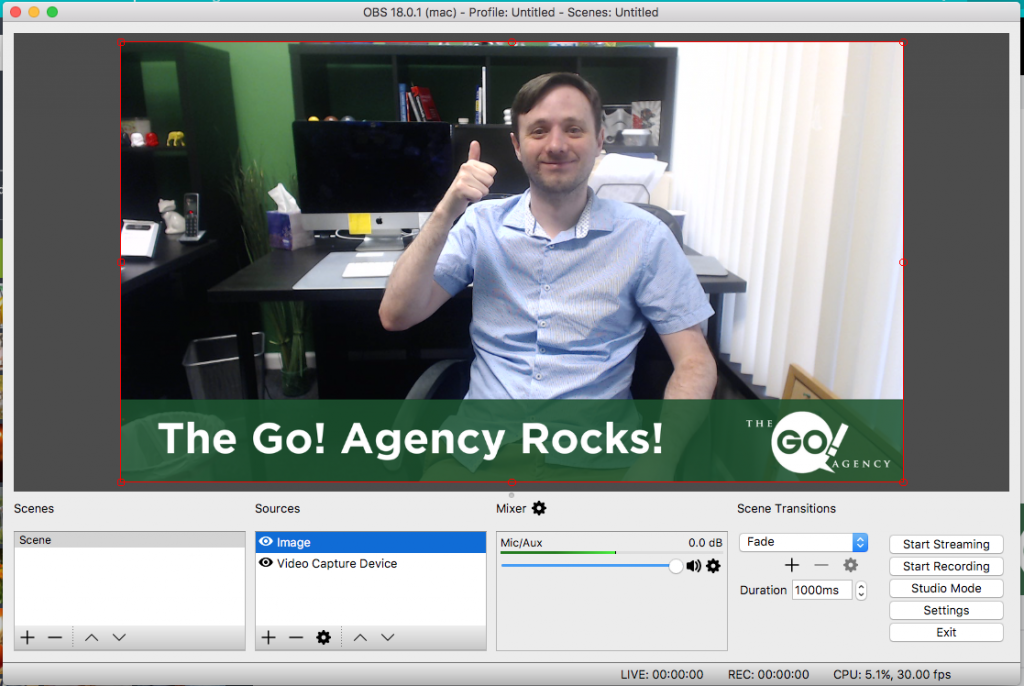
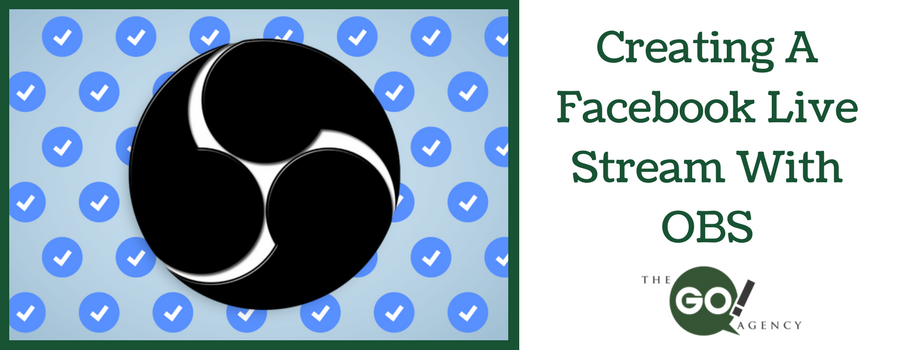
Creating a Facebook Live Stream
1. Go to your Facebook page and click on “Publishing Tools” in the top menu bar.
2. Next, in the left-hand menu click on “Video Library”. This will bring up every video published on your Facebook page.
3. Now click on “+Live” to start a new Live stream.
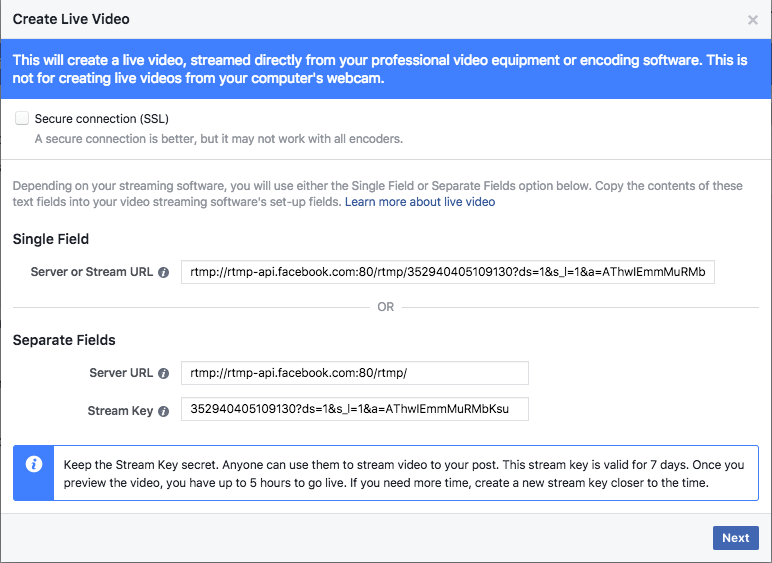
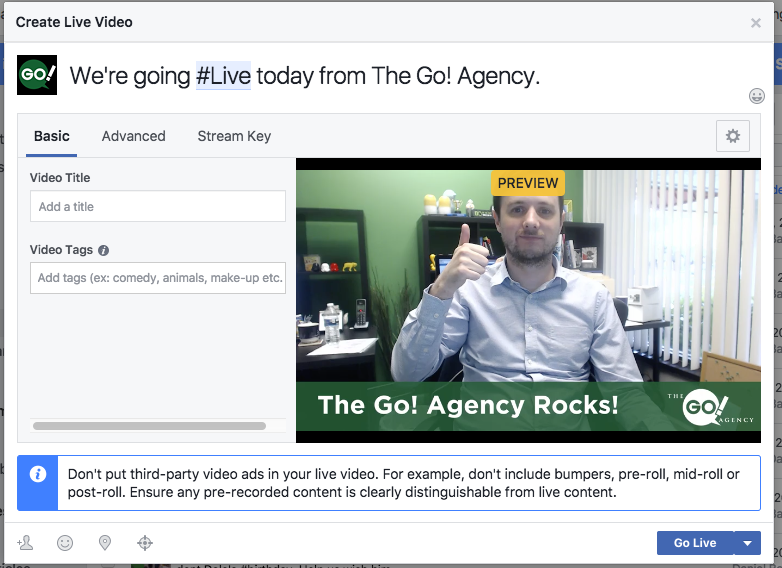
4. A box should appear with some Live stream details:
Simply click “Next” for now.
5. If you’ve done a Live video before, the next screen should look familiar. This is where you type in the status update for your video and a title before clicking “Go Live”.
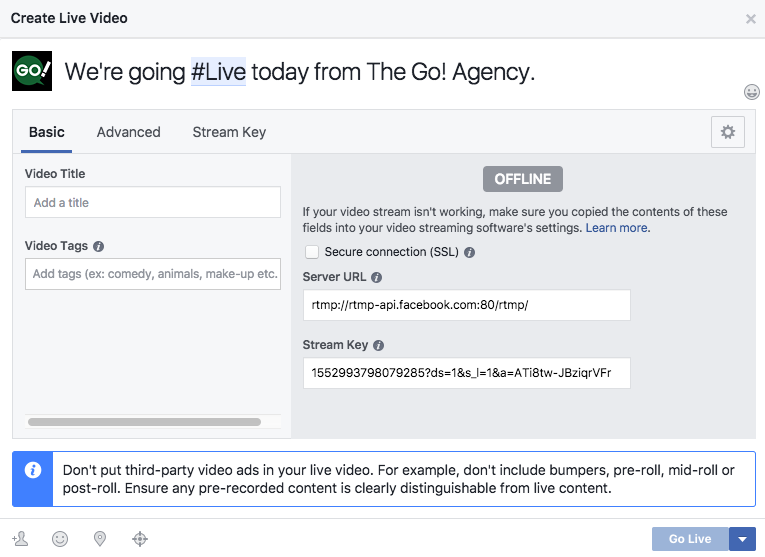
You’ll notice you can’t click Go Live yet and it’s showing your video as OFFLINE. That’s because we haven’t connected OBS to our Live yet.
Connecting OBS To Our Facebook Live Stream
To tell OBS where to send its video, we first need to get our Facebook Live Stream Key.
The Stream Key is a unique key that is created for every single Live to identify it. Once the key has been used, it can no longer be used again. So every time you start a new Live, a new Stream Key is created.
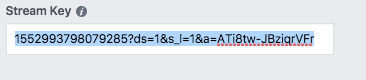
Copy the Stream Key.
If you now head over to OBS and click on “Settings.” You can then go to the Stream tab.
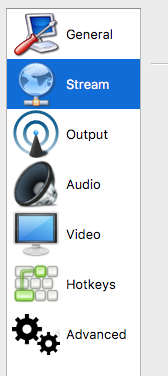
From here, all you need to do is select “Facebook Live” from the Service menu, then paste our stream key into the stream key box.

Click on “OK” in the bottom right-hand corner. Then “Start Streaming”.Now if you go back to your Facebook, you’ll notice that video has appeared.Here’s our wonderful Marketing Assistant Dan again to demonstrate:
You may notice that there is a bit of a lag between what appears on your Facebook stream and what you’ve just done. Sometimes it can be up to 20 seconds.This is because your video isn’t going directly to Facebook, but it’s going through OBS first. So you need to be mindful that you’ll want to end your Live a few minutes after you finish to allow your stream to catch up.Now to go Live, it’s simple. Just click “Go Live” on Facebook.Remember, the next time you go live, your Stream Key will change, so you will have to copy over your new stream key to OBS every time you create a new stream!
Hopefully, by now you’ve got a professional looking Facebook Live going out to the world. Next week, I’ll explain how to use multiple overlays together to transition between scenes in your Live to add an extra layer of cool.