Tag : linkedin

What Your Social Media Marketing Doesn’t Have (But Really NEEDS!)

Go-Agency-Blog-Template-2-200x300
2Jul

At this time, millions of businesses are on social media. Yet this doesn’t mean they are all successful. Perhaps, they have created accounts out of sheer obligation to a boss, or it was a one-shot attempt to stay trendy. As social media gurus, we see these kinds of accounts often. “Bare bone accounts” do the minimum by showing up on their platform of choice’s search results. However, this actually backfires on the owners by disappointing fans due to their lack of content. What should a social media account bring to customers?

To utilize the potential of your business profiles, you will want to optimize your page. In detail, go through each area that Facebook, Twitter, and other platforms offer, and your profile will have increasingly positive results. Sure, your name, address, phone number, and website address are all important, but an effective page requires in-depth copy for short descriptions, a company overview, a mission statement, and several other areas of the page.

Customers do not enjoy having to search for your resources and they shouldn’t have to. Facebook offers you two menus to provide helpful links. The “Apps” section allows your  business page to showcase the essential pages of your company’s web presence. This section can also turn into a handy portal to your other social media platforms. The top of the page’s horizontal menu can be customized to transport customers to your most important assets and the web pages you want them to visit.

Twitter offers less optimization options, so you will want to take advantage of every single line offered. Descriptions, web addresses, locations, and a powerful cover image will make your profile look just right. Like everything else about Twitter, their customization options are effective and sleek.

Unlike Twitter, LinkedIn has tons of room for customization. Fill out as many fields as possible. Both personal and business pages have their own unique set of options, so take your time and don’t leave any room for customers’ unanswered questions. Your pages should speak for themselves!

Every platform offers different ways to present your information. Optimizing your page is one of the most important early steps in social media success. Here is another tidbit- this isn’t a once and done step. As your company grows, so should the information on social media. Keep everything updated and accurate. You may find this process repetitive, but by enriching all your pages with as many details as possible, a whole new level of professionalism will be yours!  

What optimization tricks do you know of? Share below!

Click Here to Subscribe to Our Free Newsletter

Read More

Steps To Stay Ahead In Social Media

Steps-To-Stay-Ahead-on-Social-Media-200x300
30Jun

It seems that news stories have shorter and shorter life spans with every major event. Events that happened last week are already old news thanks to the internet. We are hungry for fast, fresh, and high-quality content and it is up to social media marketers to deliver. How exactly do you keep up with it all? Here are some helpful steps to take:


  • Schedule. While planning your posts for a particular period of time won’t help you with breaking news, scheduling ahead will be one of your most beloved tools. If you devote a few hours each week to social media, you will not feel obligated to spend every moment on the computer. Then, use either the native scheduler of your social media platform of choice or a third party such as Hootsuite so your updates will go live when you want them to.
  • Stay Informed. Be sure to have a sharp eye on what is happening in the world and in your industry. To do this, you will want to follow the leaders of your field and reputable news sources. Once you see news start to break, it will erupt over the internet landscape very quickly, so jump in early.


  • Watch the calendar. Of course, knowing the date is important, but what we are referencing here is keeping on top of seasonal trends. Holidays, awareness months, and anniversaries all bring success to social media marketing. You don’t want to be that one Facebook page that doesn’t wish a Happy Mother’s Day!

Social media marketing isn’t easy. It is hard to keep up with all the moving cogs and gears that make up the internet. Yet with these tips, you will be good to go!

Do you have any other tips about staying ahead? Comment below!

Click Here to Subscribe to Our Free Newsletter

Read More

You Published A Blog! Now What?

You-Published-A-Blog-Now-What-200x300
29Jun

We are here at the end of our blogging for business series and you should be ready to post some great content on your new blog! After you hit that publish button, thousands of fans are guaranteed to visit your site in just hours, right? Not so true. While SEO is an important tool in promoting a blog, you will need a little more help getting noticed in the overly crowded internet landscape.

Your blog is not meant to replace your social media marketing. Quite the opposite, actually. Both of these internet-based tools are meant to work symbiotically together. You should be proud of your new blog post and as such, you will want to promote it on every social media account you have! On your website, where your blog hopefully lives via a link on the menu, you should have the links to your social media pages. All of this is your material and as such it should complement itself through internal promotion.

WANT MORE SOCIAL MEDIA SECRETS? CLICK HERE FOR YOUR FREE EBOOK!

You can also publish your newly-crafted article on Facebook Notes and LinkedIn to share with your followers. LinkedIn is particularly effective at this as it has the ability to share your writing with fifty groups. Talk about publicity!

You will also be able to use your blog article’s copy in your newsletters and email blasts. Original material is precious so you should take advantage of the writing you now own and broadcast it through all avenues.

We hope you enjoyed our series about blogging for business. Now let’s see what kind of awesome blog posts you come up with! If you ever have any questions about blogging or social media marketing in general, please feel free to contact The Go! Agency team!

Do you have any thoughts on how to share your blog? Comment below!

Click Here to Subscribe to Our Free Newsletter

Read More
How To Be A Social Media Business Knock Out

How-to-be-a-Social-Media-Business-Knock-Out--200x300
28Jun

There’s a big difference in how one uses social media for personal use and for business. When you’re using it personally, you really don’t have much to lose other than agitating a friend or two with an off-color post. When it comes to posting for your business however, every move you make is important. You are no longer posting as a person, you are now a living, breathing, personified business typing away. What are the best tactics to use when representing your business? Here are Small Business Trends’ four best ways to handle this new audience:

  • Be sure your posts have a nice medium between being widely-relatable and catering to your demographic. They should appeal to a certain audience, but you don’t want it to be so specific nobody will understand but the pros.
  • Even if you don’t have many viewers, engage with them and listen to what they have to say about your content. Many followers will share your thoughts if you give them an avenue to. Listen to their feedback and adapt your approach. If you use social media right, your follower numbers will increase.
  • Being ambitious is great, but biting off more than you can chew will leave your audience hungry for content. Having a full list of posts without having the resources to accomplish them is setting yourself up for failure. Don’t automatically expect an ROI from social media posts. It doesn’t work quite like that and expecting a spike in sales immediately isn’t rational.
  • When looking at your user feedback, take it with a grain of salt. Realize a lot of it is subjective. It is important to remember fundamentals when posting information as well. Having a social media expert’s advice is priceless when trying to figure out the best strategy.

For additional details of Small Business Trends’ four tactics check out their article here: http://ow.ly/pfD930094uZ

Do you have any other tips that can help a business thrive on social media? Let us know!

Click Here to Subscribe to Our Free Newsletter

Read More

Are Your Images Social Media Ready?

Are-your-images-social-media-ready-200x300
20Jun

With social media platforms like Instagram, Pinterest, and Snapchat rising in popularity, we see visual content becoming increasingly essential. After all, who wants to read anymore? Social media requires a nice balance of eye-capturing imagery and engaging copy. That being said, you can’t just pick a random picture, throw it onto your timeline, and expect gold. There are certain requirements each platform administers. So let us see just how ready your photo library is for social media, shall we?

Those who run the big social media companies know full well that images are key to a successful post. These people have a job to do, which is controlling the stream of content that goes through their platforms and to ensure it doesn’t turn into chaos. As a result, dimensions for imagery have been created and must be adhered to. Since these images are on the web, they are measured in pixels. Here are the rules:

Facebook:
– Cover photo- 851px x 315px

– Profile photo- 180px x 180px

– Images in updates- 1200px x 630px

Twitter:

– Header photo- 1500px x 500px

– Profile photo- 400px x 400px

– Pictures embedded in tweets- 440px x 220px

Instagram:

-Profile photo- 110px x 110px

-Thumbnail photos- 161px x 161px

-Posted images- 640px x 640px

LinkedIn:

– Cover photo- 974px x 300px

– Profile photo- 400px x 400px

– Banner image- 646px x 220px

If you decide to go against these rules, you’ll find yourself with an image that has been inappropriately cropped or a pixelated mess. Consult with your graphic designer, photographer, or social media manager to be sure that your pics are perfect.

Share your thoughts with us below!


Click Here to Subscribe to Our Free Newsletter

Read More

4 Steps to Keep ALL Your Social Media Accounts Consistent

4-steps-to-keep-ALL-your-social-media-accounts-consistent.jpg-200x300
11Jun

To really make it in the social media universe, you need to establish yourself on the most popular platforms. Becoming a user of many accounts is a great idea, but easier said than done. To truly take care of social media, your business will need one of the following:

      Facebook

      Twitter

      LinkedIn

      Instagram

      Twitter

–       YouTube

Google+, Snapchat, Periscope, and more are helpful additions, but when you’re starting out, I’d try to tackle social media’s “Big 6” first. Take our word for it- it’ll be more work than you think. At first glance, you’ll want each of these accounts to be as unique as a snowflake. Well, first of all, you’ll turn social media into a round-the-clock gig if you do that. Second of all, your branding will become an absolute mess. While you want each post to be consistent, you don’t want each account to be unrecognizable from each other. Here are some of the best ways to keep your many profiles consistent with branding.

Pictures– Even if you have a large portfolio of headshots, and many versions of your logo, you need to stick with one for your profiles. You don’t want people guessing if it really is you. They want something familiar when trying to follow you!

Adapted Updates- When you’re writing your posts, you’ll typically want to make two versions. One will be for your Facebook, Google+, etc. The second one will be to conform to Twitter’s 140 character limit. For the Twitter version, you’ll also be able to mention other Twitter accounts with their twitter handle. For example, you can say “Congrats @JasonTodd for closing on your new house!”

Long Forms- When you’ve written an article based around your profession, you can share it on Facebook’s Notes feature, LinkedIn, and of course post it to your own blog. Social media is an exception to the “duplicate content” rule for websites. People who use social media tend to understand that these posts are yours and you should spread it through all avenues.

Keeping Info Straight- Have multiple website domains? What about phone numbers? Social media isn’t the place for inconsistencies. You want to keep things clear and concise for your followers. Don’t make it so they have to guess what phone number to call.

You want your social media to be unique, but you don’t want it to be a “mishmash” of content. Keep things correct, clear, and constant so your customers and followers will know what they’re dealing with!

What are your thoughts on keeping things straight? Comment below!

Click Here to Subscribe to Our Free Newsletter

Read More
3 Time Saving Social Media Content Shortcuts

shortcut
11Nov

With all of the importance companies are beginning to place on social media, it’s imperative to stress the right aspects of your business.  When we speak with potential clients at The Go! Agency, we find that many times their focus is not on their message, but on the return they can expect.

While I think that ROI is an important topic to discuss, what’s more important with social media is the term “social”.  When a business gets involved with social media marketing, what they are agreeing to is the fact that they are ready to join the online conversations that are already happening regarding their industry, and their very own company.

So….what are you going to say?

Formulating creative and engaging content on a regular basis can be overwhelming.  On average, companies are putting out two status updates per day per network.  So as a baseline, the average amount per week is 14 individual posts.  That’s a total of 56 per month!

Here are a few ideas that you can add to your monthly content list which will help you to reduce the amount of time that you spend generating new content.  Sometimes by half!

Themed Days
Above and beyond, this is the easiest way to not only create a conversation with your target audience, but help engage them in a familiar way.  Have you heard of “TBT” or Throw Back Thursday?  This trend has swept through the social media world and now more and more companies are using this tactic in an effective way.  My suggestion is to choose one or two days per week to start.  For example maybe you can use Monday and Thursday.  If you are a healthcare related business, perhaps Medical Monday and Thankful Thursday and share content that is branded to those to titles and ideas.  Remember to use visuals as much as you can.

Ongoing Quizzes
Asking questions is always a great way to engage your audience, but if you want to go one step further have an ongoing quiz plan.  First, you can create the theme of your quiz around a certain month.  For example, Breast Cancer Awareness Month for a woman’s hospital system.  You probably have many interesting statistics and FAQs about breast cancer that you can share.  So why not run a quiz for 5 days in a row each week – Monday through Friday.  Come up with a new question (along with a visual) dealing with breast cancer and ask your audience.  An example could be: “True or False: Breast Cancer is the leading killer of American Women.” Something as simple as that can work wonders!

Fill in the Blanks
People love engaging and sharing their opinion.  Providing fill in the blank statements is a terrific way to get your target market talking.  I wouldn’t suggest going overboard with these, but once a week why not try one out.  It can also be used in conjunction with your Themed Days, for example on a Thankful Thursday you can share “Today I am most thankful for ______.”  These also can help you see what your audience is most interested in.

Now, by just using these few tools listed above you can cut down the amount of content you have to create by half, if not more.  Creating an ongoing content strategy is a must, and by adding these elements to the mix, you cut your work down while creating instantly engaging content for your audience!

Need Online Marketing Help?

Fill Out the Form Below and We Will Get Right Back to You!

[ninja_forms_display_form id=1]

Read More

Long-Form Posts on LinkedIn: The Secret to Building Visibility and Credibility

Create_a_New_Post___LinkedIn
4Nov

LinkedIn has long been one of my preferred social media networks due to the fact that if if you are interested in targeting professionals in your preferred market, it truly is second to none.

If you are new to LinkedIn, you will quickly find that the more you dig into the site, opportunities will present themselves which will allow you to engage other professionals that are interested in learning more about your topic.  These opportunities can drive lifelong relationships, referrals and sales.

There are many ways to showcase your credentials and knowledge on LinkedIn.  It goes without saying, that the first step is to create an engaging profile and company page.  You can also join groups.  You can also write updates.

Now you can do one better.

Long-Form Posts.

LinkedIn launched these with the view to help its users showcase their knowledge in a whole new way.  Now when you publish a Long-Form Post your original content will be showcased in a few different ways:

*It is immediately shared with all of your followers

*It is immediately shared with all of your connections

*It is searchable both on and off LinkedIn

*It gives someone outside your network the opportunity to follow or connect with you

*It becomes part of your professional profile, with its own section.

Not too shabby, right?

So how can you start using this today?  Find suitable posts from your content arsenal.

If you have a blog or regularly write articles that you share across the web, this is perfect content fodder for the LinkedIn Long-Form Post.  Remember, the term is long-form, so we are not talking 200-300 words.  Go long!

Now that you have your content, here’s the step by step (and simple) process of publishing your first Long-Form post:

  1. Log into your LinkedIn account.
  2. On your “Home Screen” you will see your picture with a white box next to it with the words “Share an update…” in it.  If you look to the right side of this box, you will see a small pencil icon.  When you cursor over it, the words “Share an Update” appear.  Click this.
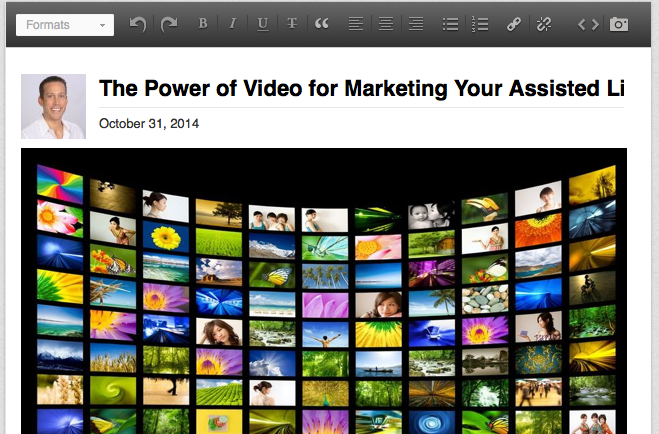
  3. A new screen will open which looks similar to a Word document.  Here is where you can cut and paste your existing content or get to writing something fresh.  You have all of the basic formatting options here as well as the opportunity to add pictures, hyperlinks, and embed media.
  4. After you have added your title, completed your content, and formatted your post – it is time to post! I suggest clicking the “Preview” button to see how your Long-Form Post will look to other LinkedIn members.  Once you are happy with what you see, simply click publish…and you are done!  By the click of that button, everyone that is connected with you will receive a notification that you have just published a new post.

While this is a fairly simple process to reach so many, make sure that your message is worth everyone’s attention.  Crafting a useful note which is packed with value for the members of your target market is an absolute must!  My top tip here is to always think about what your target audience is interested in while coming up with anything that you post online.  If your goal is to engage future referral sources or clients, provide information that they would enjoy.

LinkedIn Long-Form Posts are just another way that LinkedIn is helping you share your expertise while increasing your visibility on the site.  Definitely worth a look!

Need Online Marketing Help?

Fill Out the Form Below and We Will Get Right Back to You!

[ninja_forms_display_form id=1]

Read More

LinkedIn Showcase Pages: A Major Change to Your LinkedIn Company Page

Screenshot-of-Office-Showcase-Page-of-Microsoft-Company-Page-11-18-2013-10-11-01-PM1-640x327
14Apr

If you have been keeping up with the content I share here on our blog, as well as on my radio show “The Social Marketing Academy”, you will know that I am a huge proponent of the power of using LinkedIn to promote and brand your business online.  The sheer number of possibilities available to your business on LinkedIn is seemingly endless.

Aside from your professional LinkedIn profile (which is where you go when you log into your LinkedIn account) you also have the opportunity of creating a LinkedIn Company Page.  I’m sure that many of you reading this already have LinkedIn Company Pages and have packed them with the information your target market would find engaging.

But did you know that LinkedIn has recently made a major change to that Company Page?

If you are reading this now, your LinkedIn company page no longer has a “Products” or “Services” page – as well as a featured products and services splash page.  This page appeared on the top tab next to your logo and when you clicked on it, you were able to see the list of products and services as well as an optional splash page to further engage your audience.

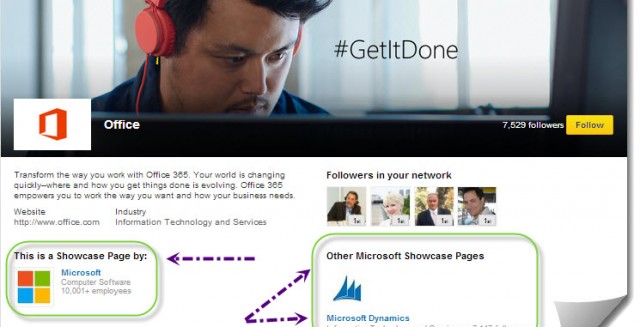
While this leaves a huge void in your Company Page – trust LinkedIn to already have the solution ready for you to use.  In order to help companies focus more on sharing information regarding specific services that are offered by their companies, LinkedIn has created “Showcase Pages” which allow you to create a custom page for each individual product or service that your business offers.

These pages can be very useful in increasing visibility to key service/product offerings that you want to focus on, so let’s get you started in creating your first Showcase Page today!

Here is a quick step-by-step guide to getting your LinkedIn Showcase Page up and running in just a matter of minutes:

  1. From all of your products/services, choose your most popular one to focus your first Showcase Page around.
  2. Go to your LinkedIn Company Page and then click the “Edit” tab on the right-hand side.  On the drop-down menu, choose “Create a Showcase Page”.
  3. On the box that pops up, add your Showcase Page Name – which would be the name of the product or service that you have chose to feature. Then choose the page administrators (you will be shown as a default administrator) and click “Create Page”.
  4. This will now take you to the main “Overview” section of your Showcase Page.  This is where you have to get your branding right. It all starts off with your Full Width Image.  This will be similar to your Facebook Cover Image and should be inline with the branding you use on your website or online point of sale. Make sure that this is 974 x 330 pixels or larger with a maximum file size of 2MB. It can be in PNG, JPEG or GIF formats. Click “Add Image” and then choose it from your files, upload and click “Save”.
  5. Now you will see a gray box where there are 3 items you need to complete.  First, choose the language you want to optimize your Showcase Page Name and Description for.
  6. Next make sure that your Showcase Page Name is correct, and then move onto the Showcase Page Description section.  Here you need to briefly describe your product or service and let your target audience know what to expect from this page.  The catch?  You only have 200 characters to do it with – so you have to get right to the point! Note: I think this is the most challenging step of creating the Showcase Page.
  7. Designated Admins: here you can add or change the administrators that you chose when you first created the Showcase Page.
  8. Logos.  Now you have to choose your logos for the page (which is very similar to when you create your Company Page in the first place).  If your product or service has its own unique logo, then add it here.  If not, use your company logo in these spaces.  Make sure that your standard logo is 100 x 60 pixels and your square logo is 50 x 50 pixels.  These will be used in your Showcase Page’s network updates, so make sure it is on-point!
  9. Featured Groups.  Do you have a custom LinkedIn group directly associated with the topic of your Showcase Page?  If so, add it to the Featured Groups section by typing in the name and choosing it from the list provided.
  10. Next scroll up to the top, and on the right-hand column you will see a spot that asks you for your Showcase Page Website URL.  Copy and paste in the URL from the page in your website that is directly associated with the product or service you are featuring on your Showcase Page.
  11. Now choose your Main Showcase Page Industry from the drop down list.
  12. If you want to associate your Showcase Page with your company, click “Enable”.  If not, leave the box unchecked.
  13. Click Publish!

Now you have created your first Showcase Page!

But what now?

Now you will be able to share updates to this Showcase Page that are SPECIFIC to the product or service.  Say for example, that your company is an assisted living facility and you have created a Showcase Page around your “Memory Care” service.  So, when you go to post updates to your page, these posts will be related to your memory care service, memory care topics and other related items that would interest those members of your target market who you want to engage with your page.

Essentially Showcase Pages are Company Pages on steroids as you can provide a full page of useful information related to a specific product or service.  Make sure that you are able to post on a consistent basis and make sure that you promote them to your extended networks online and off.

Need Online Marketing Help?

Fill Out the Form Below and We Will Get Right Back to You!

[ninja_forms_display_form id=1]


Read More

How to Enhance and Maximize Your LinkedIn Company Page

20Aug

In my previous post I showed you how to create a Company Page for your business on LinkedIn as well as how to add your products and services to the page to increase visibility and credibility.

Now there is another step that will take your LinkedIn Company Page to the next level, but it is one that is little known.  There is a feature on LinkedIn that will enable you to customize how your page appears to people in different regions, but more importantly you can enhance your page visually.  Here’s how!

1.  Login to LinkedIn and then navigate to your LinkedIn Company Page.

2.  Click on “Services” when you get to your page.

3.  Once on the “Services” page, click on “Edit”.

4.  Now you will see that the view on the page has changed drastically. There will be a 4 step process to complete to customize your page fully.  First up is to setup your default settings, to do this you can skip “Step 1. Create multiple variations of this page.”

5.  Now onto Step 2.  Here create an eye-catching header and description that completely describes what you do and is packed with keywords to enhance your LinkedIn visibility.

6.  Now onto Step 3, which I think is absolutely crucial to make your page visually stunning.  You are able to create three different banners of 646 x 222 pixels (max 2MB in size).  I would suggest that you use the following topics to create a banner around: sales, key products, new services, exclusive information,etc.  It would be useful to have a graphic designer create these for you, preferably the one who has created the rest of your branded collateral.  Once you have these, first copy and paste the URL that you would like the image to click through to into the space provided.  Then click on “Add a banner image here”, browse for the image, choose and save.  Then repeat this for the second and third banners.

7.  Step 4 is extremely useful, as when you add multiple services and products to your LinkedIn Company Page, the order they are presented may not be how you want them to appear.  Here you are able to choose the order of how your services will be presented.  Simply click on the drop-down menus and choose each accordingly.

8.  The last area to be completed on the left hand side is the Disclaimer, if you have one, add it here.

9.  Now onto the right hand side, which is quick and easy.  If you have a video that is available on YouTube which presents an overview of your company, products and/or services this is where you can feature it on your page.  First add an eye catching, keyword loaded title and then copy and paste the YouTube video URL.  Once you are done, scroll to the top of the page and click the “Publish” button on the right hand side.

Now you can take a look at your new page and test it for effectiveness.  Make sure that the images appear as desired and that the click-through links are accurate.  Check to see if the video is working adequately.  Double check the spelling and keyword placement.

And there you are!  You have created your first enhanced LinkedIn Company Page!  Now get out there and let people know about it by sharing links to your page on your personal profile as well as your other social media profiles.

Need Online Marketing Help?

Fill Out the Form Below and We Will Get Right Back to You!

[ninja_forms_display_form id=1]

Read More
x
Bulletproof Marketer