Tag : linkedin company page

LinkedIn Showcase Pages: A Major Change to Your LinkedIn Company Page

Screenshot-of-Office-Showcase-Page-of-Microsoft-Company-Page-11-18-2013-10-11-01-PM1-640x327
14Apr

If you have been keeping up with the content I share here on our blog, as well as on my radio show “The Social Marketing Academy”, you will know that I am a huge proponent of the power of using LinkedIn to promote and brand your business online.  The sheer number of possibilities available to your business on LinkedIn is seemingly endless.

Aside from your professional LinkedIn profile (which is where you go when you log into your LinkedIn account) you also have the opportunity of creating a LinkedIn Company Page.  I’m sure that many of you reading this already have LinkedIn Company Pages and have packed them with the information your target market would find engaging.

But did you know that LinkedIn has recently made a major change to that Company Page?

If you are reading this now, your LinkedIn company page no longer has a “Products” or “Services” page – as well as a featured products and services splash page.  This page appeared on the top tab next to your logo and when you clicked on it, you were able to see the list of products and services as well as an optional splash page to further engage your audience.

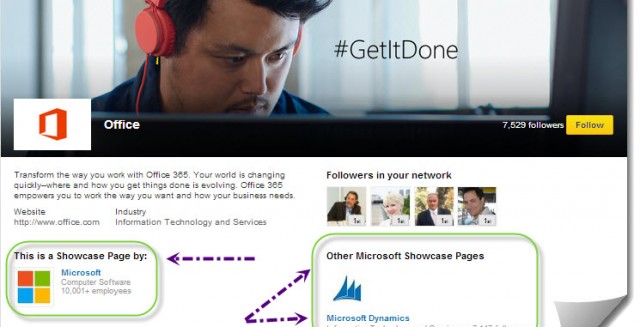
While this leaves a huge void in your Company Page – trust LinkedIn to already have the solution ready for you to use.  In order to help companies focus more on sharing information regarding specific services that are offered by their companies, LinkedIn has created “Showcase Pages” which allow you to create a custom page for each individual product or service that your business offers.

These pages can be very useful in increasing visibility to key service/product offerings that you want to focus on, so let’s get you started in creating your first Showcase Page today!

Here is a quick step-by-step guide to getting your LinkedIn Showcase Page up and running in just a matter of minutes:

  1. From all of your products/services, choose your most popular one to focus your first Showcase Page around.
  2. Go to your LinkedIn Company Page and then click the “Edit” tab on the right-hand side.  On the drop-down menu, choose “Create a Showcase Page”.
  3. On the box that pops up, add your Showcase Page Name – which would be the name of the product or service that you have chose to feature. Then choose the page administrators (you will be shown as a default administrator) and click “Create Page”.
  4. This will now take you to the main “Overview” section of your Showcase Page.  This is where you have to get your branding right. It all starts off with your Full Width Image.  This will be similar to your Facebook Cover Image and should be inline with the branding you use on your website or online point of sale. Make sure that this is 974 x 330 pixels or larger with a maximum file size of 2MB. It can be in PNG, JPEG or GIF formats. Click “Add Image” and then choose it from your files, upload and click “Save”.
  5. Now you will see a gray box where there are 3 items you need to complete.  First, choose the language you want to optimize your Showcase Page Name and Description for.
  6. Next make sure that your Showcase Page Name is correct, and then move onto the Showcase Page Description section.  Here you need to briefly describe your product or service and let your target audience know what to expect from this page.  The catch?  You only have 200 characters to do it with – so you have to get right to the point! Note: I think this is the most challenging step of creating the Showcase Page.
  7. Designated Admins: here you can add or change the administrators that you chose when you first created the Showcase Page.
  8. Logos.  Now you have to choose your logos for the page (which is very similar to when you create your Company Page in the first place).  If your product or service has its own unique logo, then add it here.  If not, use your company logo in these spaces.  Make sure that your standard logo is 100 x 60 pixels and your square logo is 50 x 50 pixels.  These will be used in your Showcase Page’s network updates, so make sure it is on-point!
  9. Featured Groups.  Do you have a custom LinkedIn group directly associated with the topic of your Showcase Page?  If so, add it to the Featured Groups section by typing in the name and choosing it from the list provided.
  10. Next scroll up to the top, and on the right-hand column you will see a spot that asks you for your Showcase Page Website URL.  Copy and paste in the URL from the page in your website that is directly associated with the product or service you are featuring on your Showcase Page.
  11. Now choose your Main Showcase Page Industry from the drop down list.
  12. If you want to associate your Showcase Page with your company, click “Enable”.  If not, leave the box unchecked.
  13. Click Publish!

Now you have created your first Showcase Page!

But what now?

Now you will be able to share updates to this Showcase Page that are SPECIFIC to the product or service.  Say for example, that your company is an assisted living facility and you have created a Showcase Page around your “Memory Care” service.  So, when you go to post updates to your page, these posts will be related to your memory care service, memory care topics and other related items that would interest those members of your target market who you want to engage with your page.

Essentially Showcase Pages are Company Pages on steroids as you can provide a full page of useful information related to a specific product or service.  Make sure that you are able to post on a consistent basis and make sure that you promote them to your extended networks online and off.

Need Online Marketing Help?

Fill Out the Form Below and We Will Get Right Back to You!

[ninja_forms_display_form id=1]


Read More

How to Enhance and Maximize Your LinkedIn Company Page

20Aug

In my previous post I showed you how to create a Company Page for your business on LinkedIn as well as how to add your products and services to the page to increase visibility and credibility.

Now there is another step that will take your LinkedIn Company Page to the next level, but it is one that is little known.  There is a feature on LinkedIn that will enable you to customize how your page appears to people in different regions, but more importantly you can enhance your page visually.  Here’s how!

1.  Login to LinkedIn and then navigate to your LinkedIn Company Page.

2.  Click on “Services” when you get to your page.

3.  Once on the “Services” page, click on “Edit”.

4.  Now you will see that the view on the page has changed drastically. There will be a 4 step process to complete to customize your page fully.  First up is to setup your default settings, to do this you can skip “Step 1. Create multiple variations of this page.”

5.  Now onto Step 2.  Here create an eye-catching header and description that completely describes what you do and is packed with keywords to enhance your LinkedIn visibility.

6.  Now onto Step 3, which I think is absolutely crucial to make your page visually stunning.  You are able to create three different banners of 646 x 222 pixels (max 2MB in size).  I would suggest that you use the following topics to create a banner around: sales, key products, new services, exclusive information,etc.  It would be useful to have a graphic designer create these for you, preferably the one who has created the rest of your branded collateral.  Once you have these, first copy and paste the URL that you would like the image to click through to into the space provided.  Then click on “Add a banner image here”, browse for the image, choose and save.  Then repeat this for the second and third banners.

7.  Step 4 is extremely useful, as when you add multiple services and products to your LinkedIn Company Page, the order they are presented may not be how you want them to appear.  Here you are able to choose the order of how your services will be presented.  Simply click on the drop-down menus and choose each accordingly.

8.  The last area to be completed on the left hand side is the Disclaimer, if you have one, add it here.

9.  Now onto the right hand side, which is quick and easy.  If you have a video that is available on YouTube which presents an overview of your company, products and/or services this is where you can feature it on your page.  First add an eye catching, keyword loaded title and then copy and paste the YouTube video URL.  Once you are done, scroll to the top of the page and click the “Publish” button on the right hand side.

Now you can take a look at your new page and test it for effectiveness.  Make sure that the images appear as desired and that the click-through links are accurate.  Check to see if the video is working adequately.  Double check the spelling and keyword placement.

And there you are!  You have created your first enhanced LinkedIn Company Page!  Now get out there and let people know about it by sharing links to your page on your personal profile as well as your other social media profiles.

Need Online Marketing Help?

Fill Out the Form Below and We Will Get Right Back to You!

[ninja_forms_display_form id=1]

Read More

Feature Your Brand on LinkedIn with a Company Page: Here’s How!

15Aug

If you have been using LinkedIn as a networking tool for yourself, you understand how wonderful it can be in helping you connect with hard to reach people while gaining lots of visibility and credibility for your company.

Another great way to promote your business and extend your reach on LinkedIn is to create a Company Page.  While they have been around for awhile, there have been many enhancements over the past year that have made these an eye-catching spot to showcase your brand on LinkedIn.

But, how do you do it?  Here are the quick steps that you need to know to get setup in under an hour!

  1.  After you have logged into LinkedIn, Click on the “Companies” tab from the top menu.
  2. On the main companies page, if you look to the top right hand side of the page you will see “Add a Company”.  Click this.
  3. Now you will see the “Add a Company” page where you will need to verify the company and your involvement with it.  So add your company name (as you would like it to be found in searches) and your email address at the company.  If you have multiple email addresses that you use for work, use the one that contains the domain of your website.  For example, I would use christopher@http://citsprojects.in/clientprojects/thegoagencyusa as our website is http://citsprojects.in/clientprojects/thegoagencyusa.  Once you have done this, click “Continue”.
  4. Now LinkedIn will send you a verification email that you will need for the next step.  Check your email and when it comes through, click on the link to verify and create the page.
  5. Once you do this, you will be taken to your main Company Page – but it will be blank.  This is where you start.  If the screen is not in editing mode, click the “Edit” button on the right.  A rule of thumb is that if you want to add, remove, or edit any information on your company page, click the “Edit” button.  The “Publish” button is the equivalent of “Save” and will publish your information when you have completed editing.
  6. First, choose the language you want to optimize your Company Page for.
  7. Then make sure your company name is correct and how you would like it to appear.
  8. Now it is onto the “Company Description”.  Think of this as the “About” section of your website.  If you have an About page on your website, I would simply cut and paste it, and then make any edits for keywords and space.
  9. Next move onto the “Designated Admins” section.  This will be the list of people who are able to edit this page.  So if you have more than one person editing the page, simply type their name in the space provided and they will pop up.  Select them and they will be added.
  10. Next, the “Image”.  This will be the splash image that will be displayed on your LinkedIn Company Page.  Make it eye catching and keep it to 646 x 220 pixels and no more the 2 MB in size.  To add the image, click “Edit” then “Browse” (choose your photo from your computer) and “Upload”.  After a few seconds your image will appear and you can crop it if necessary.  If you like what you see, click “Save”.
  11.  Now you will have to edit your “Standard Logo”.  This will be a rectangular representation of your company logo.  This will be highly visible, so make sure that it is a hi-resolution and looks sharp!  Your logo need to be 100 x 60 pixels and a maximum size of 2 MB.  To add your logo, repeat the instructions from step 10.
  12. Next is your “Square Logo”.  This will be 50 x 50 pixels and a maximum size of 2 MB.  Again, repeat the instructions from step 10 to add.
  13.  Now onto your “Company Specialties”.  You will need to key in your key service offerings, specialty areas of focus and unique keywords.  For example, for The Go! Agency will have “Social Media Marketing, Website Design, SEO, Custom Copywriting” as ours. If you have more than 4 specialties that you would like to add, click the “Add more specialties” button and more spaces will appear.
  14.  The last fill in section on the left hand column is for “Featured Groups”.  These are for groups that you have either created, are an admin for, or are a member of.  To find the groups you would like to feature, simply add the name in the space provided and select.
  15.  Now onto the easy side, the right column. You will need to fill out all of the basic information about your company, including: Company Type, Company Size, Company Website URL, Main Company Industry, Company Operating Status, Year Founded, Locations and Contact Information.  This is all very straight-forward, so take your time and fill in everything completely in order to properly represent your company to the millions of members of LinkedIn.
  16.  Once you have completed the left and right column, click the “Publish” button on the top right hand of the page.

And there you go!  You have just created your first LinkedIn Company Page!  In our next post I will take you through how to add featured products and services to your Company Page to increase your ability to showcase your brand on LinkedIn.

Need Online Marketing Help?

Fill Out the Form Below and We Will Get Right Back to You!

[ninja_forms_display_form id=1]

Read More
x
Bulletproof Marketer