Working with tight marketing budgets is not a new trend: it is something that business professionals have been dealing with forever. No matter if you have an endless marketing budget or a tight marketing budget, ROI is something that must be consistently monitored based on key performance indicators (KPIs).
One of the tricks of the trade in marketing is trying to grease the ROI wheel with low-cost items that will garner a high, meaningful benefit. Whether it be clout, credibility, exposure, sales, leads, or engagement: the more of these that we can get for less the better.
Enter Online Reviews.
For example, have you ever had a prospect request a reference who they could reach out to and discuss their experience working with your company? I would venture a guess that whatever your past client/customer will say to this prospect will do more for moving the sale closer to conversion than anything else. This third-party endorsement will position you as an authority more so than 20 presentation decks, videos, or hour-long sales calls combined.
This is where the importance of online reviews become relevant. In my previous blog (Online Reviews: Your Secret to SEO Success – click here to read), I went through all of the SEO power that you will gain from online reviews on Google, Yelp, Facebook, TripAdvisor, and others. To save you time, here are the top benefits that you will reap:
- More traffic to your website,
- Rank higher in Google searches,
- Increase onsite (your website) conversions,
- Be more trusted by Google above your competition.
Now that we are clear on the benefits, I would like to show you the exact steps that you can take to get started on the journey to creating your own Online Review campaign.
To get started, you will need to compile your customer and evangelist data. This data will be in spreadsheet format (CSV file) and will contain a full list of all of the clients or customers that you have worked with. When choosing your contacts you want to use, ensure that your focus is on individuals who would be more apt to provide favorable reviews of your company.
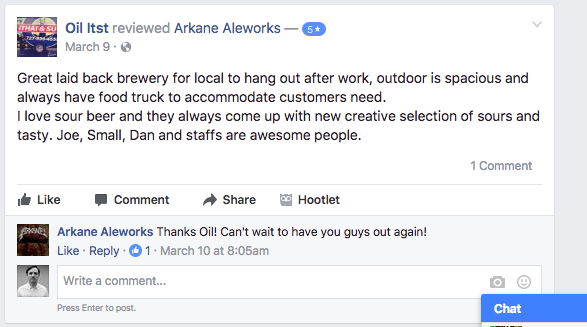
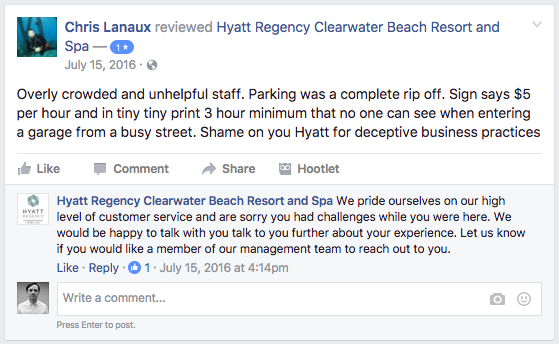
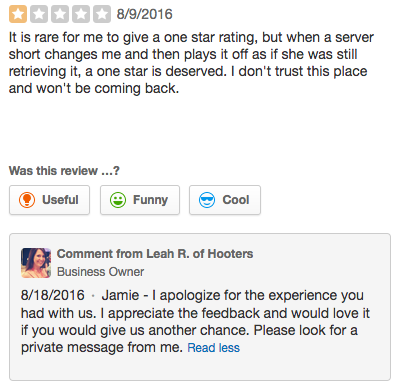
While all reviews deliver great ROI, ensure that a majority of them are positive. This is the best-case scenario. If not, please note that both positive and negative reviews present salient opportunities.
A negative review presents to your team the opportunity to win a soured customer back. To go one step further, perhaps you didn’t even realize that this client was upset in the first place.
Now let’s move onto evangelists who are your business associates, networking community, and referral sources. Any professionals who can vouch for your company or organization’s value and credibility should be added to your formal list of evangelists.
Now what you will need is a CSV (comma-separated value) file with the following information in each column:
- First Name
- Last Name
- Email Address
Having the data formatted in this manner will allow you to easily manipulate it later in your email marketing system.
Below are the steps that you need to take to extract the customer data to execute your Online Review campaign:
How to Export Contacts from Hubspot: Once you are logged into your Hubspot account, navigate to Contacts on the top tab, and then click on the subpage Contacts. Once there, on the left-hand side of the page you will see All Contacts with an Options button.
Click the arrow next to options and choose Export. On the next screen click Export and you will be emailed a link once the export is complete. You will need to clean up the CSV when you get it so that it only includes the above data. If you need to separate name files – use the equation below.
How to Export Contacts from Salesforce: Once logged in, click on the “Reports” tab and select “New Report”. On the “Accounts & Contacts” submenu select “Contacts & Accounts”. Click “Create” and then choose the correct fields for export.
In the preview selection remove the following Fields: Salutations, Title, Mailing Street, Mailing City, Mailing State/Province, Mailing Zip/Postal Code, Mailing Country, Phone, Mobile, Fax, Accounting Owner, and Account Name. Click “Run Report” after deselecting the fields. Click “Export Details”.Click on the “Export” button and save CSV file on your computer.
How to Export Contact from Constant Contact: Once logged in click Contacts and then click Email Lists. You will then need to choose the name of the list that you want to export to CSV.
Now click Export and click on the information you want to include in the CSV which would be First name, Last name, and Email address. Next, click Export and then click Activity. There you will see where you can download your contact file once it is completed.
How to Export Contacts from MailChimp: Once you are in your account go to the Audience tab. Choose the Audience you would like to export.
Then, click View Contacts and then Export Audience. Once your download is complete you will receive an email or you can view it right on your account. If you need some assistance to separate the name fields, see the expert tip below.
—–
Expert Tip: How to Separate a Full Name in One Cell to First and Last Name in Excel Documents and Numbers Documents
A frustrating aspect of dealing with customer data is when the full name is contained in one cell. Since you want to make the outreach emails personal, ensure that you separate the first and last names into individual cells on your CSV document.
Here is a quick tip to separate a full name field in Excel and Numbers so that you can easily fix this tricky issue:
How to Separate Name Field in Excel Documents: If the full name is in Column A, add an empty column by right-clicking on the top of the column next to the existing column of names, then select Insert. Then click the Data tab and navigate to the top of the column with your contacts’ names to highlight the entire column.
Now click Text to Columns and when the next window pops up choose “Delimited” and click Next. Then on the next pop-up deselect Tab and select Space. Next up, you will need to click Next and then Finish. Now you just have to rename the column headers to reflect your changes and you are done!
How to Separate Name Field in Numbers Documents: First make sure that the first name is in Column A (starting from cell A2). Create two new blank columns next to it (B and C). Next you will need to copy this code into B2 cell.
=LEFT(A2,(SEARCH(” “,A2)-1))
Then click on the cell (which you will see has the first name) and drag the equation down to the entire sheet and presto – first name populated!
Next paste this code into the cell C2:
=MID(A2,(SEARCH(” “,A2)+1),20)
Then click on the cell (which you will see has the last name) and drag the equation down to the entire sheet until all last names are populated!
—–
If you are not using any of the above and are using Gmail, Mac Mail, or Outlook – simply do a Google search for “how to export contacts in NAME” and review the results.
Now that you have your fully formatted CSV file – you are ready for the next step: deciding what websites you would like to generate reviews on. Google will be the first link you will want to choose, as this is a powerhouse when realizing a solid ROI for your efforts. You want to go through the many review sites that are relevant to your industry which could include the following:
Once you choose the sites, you need to find the URL of your review page on the corresponding site. So if you go to TripAdvisor, go to the link where people can place reviews for your business and save that URL. You will use that in your email blast to your audience so that they can simply click the URL and go to the page where the review will be placed.
Now you are ready to craft the email messages. I would suggest that you do a drip campaign consisting of at least 3 messages requesting a review, making it as personal as possible. Please note: if doing a drip, make sure that you ensure that if someone does leave a review, that they do not get the remaining email messages (if any are left to send).
Now you are ready to launch your email campaign. Do a mail merge (or if using your email program, personalizing it using the tools available on that platform) and include the links directly to your online review sites.
This is an extremely cost-effective way to gain more online reviews, bolster your SEO power on Google, increase traffic and, in effect, conversions on your website. Although if you are a busy professional this may look like a daunting time commitment.
With this in mind, The Go! Agency has developed a leading Reputation Management and Online Review service which handles the entire process for your business.
Our team handles the setup, execution, and management of all online reviews. In addition to this, we also offer a kiosk service, text back review service, and more. Call or email our team today to learn how you can get started.
Read More